Pencil drawn Circuit
This circuit is very easy, but not so efficient, I like it because children (and adults) loves it, but the materials used, being easy and cheap, are not efficient, so we are not going to use them in many experiments.
What we need:
    - 9v battery
    - one led
    - Pencil Pencil
    - Paper
    - Scotch tape
The circuit schema
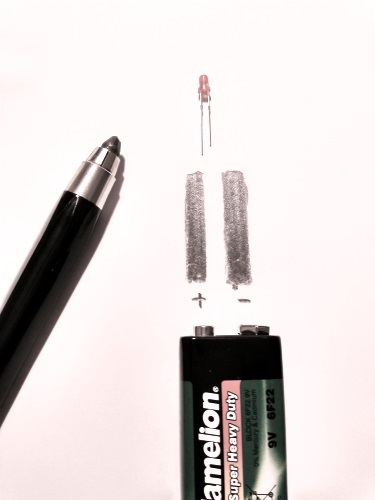
With the pencil, draw 2 parallel lines of about 3 or 4 cm and about 5 mm thick and separated 5 mm. Its important to draw them firmly. Draw a + and a - sign below each line (Not mandatory, but helps on first circuits) take a led and look at his thin legs. Usually one leg is longer, that one has to be attached to the line marked with a +. the other one goes on the - line, but you would probably had to bend both legs for that. You can use some adhesive tape to ensure each leg is in contact with the drawn line. Just one step to go. Look at the battery. It has 2 tips, one is round and another one is hexagonal. The round one must be connected to the + line, and the hexagonal to the -. If everything goes fine, your led will light,but not so strong
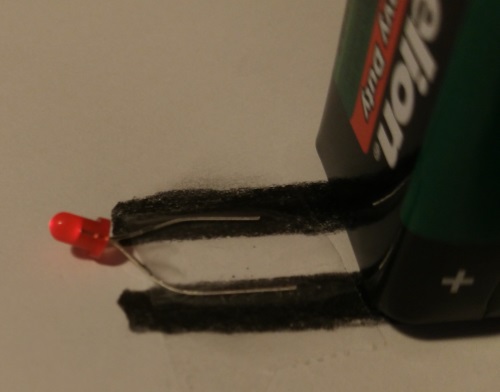
About this experiment
As you can see, the led glows, but not too much, and whe are using a quite powerful battery. If you had enough leds, you can try to connect the led to the 9v battery. There is no risk for you, but the led will burn, and become useless. 9V is too much for a simple led, but the drawn lines seems to be a bad way to connect the circuit. There is theory about this, but… not today.
Bingen
INTRO
intro